
The Uniquitous server is exported as a Unity package, which you can find on Download page. The package includes an independent Uniquitous scene which contains an GameObject with six scripts attached:
In addition to these scripts, there are other two scripts in the scripts folder which has not been attached to the GameObject:
The client is a Unity project which can be run directly in the Unity Editor. The project includes a game scene which contains a GameObject with four scripts attached:
After setting the "Initialized Game Scene" field, you can start the scene in Uniquitous package directly and it can load the Unity game automatically. Then you can click the "Initialize Server" button (Figure 7) and start running the server. When the server is started, three buttons are displayed on the screen (Figure 8). "StartAudio" button is used to control if you would like to send the game audio to the client. "StartImage" button is used to send game images before the GUI rendered. "...withGUI" button is used to send game images after the GUI rendered.
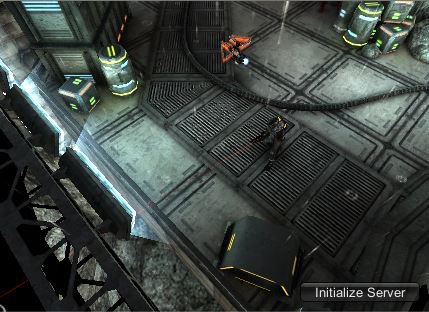
Figure 7. Step 1 (on the server)
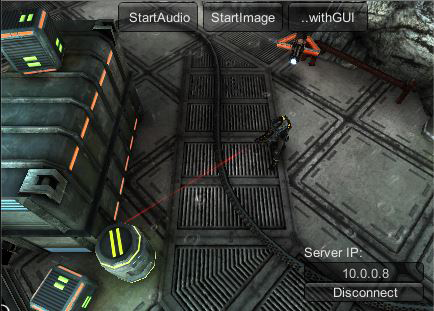
Figure 8. Step 2 (on the server)
When the client is started, the IP address of the machine the server is running on needs to be typed in on the client in order to build the connection (Figure 9). A "ReceiveAudio" button is displayed when the connection is successful (Figure 10). You can use this button to control if you would like to start receiving the game audio stream from the server.
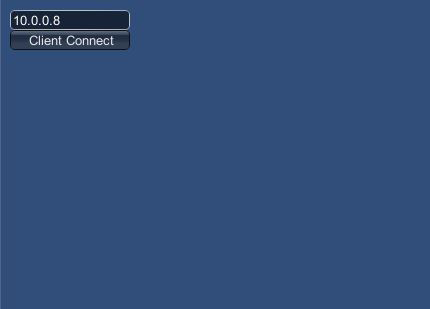
Figure 9. Step 1 (on the client)

Figure 10. Step 2 (on the client)
The interactions with the Unity build-in GUI system such as GUI.Button and GUI.TextField cannot be transferred by Uniquitous because these interactions are event based and only data on mouse positions, mouse click and keyboard strokes can be sent to the server. Instead, we developed a customized GUI system for users to use. It has a simulated mouse cursor, a simulated button and a simulated text field. More implementation details are specified in the thesis on Download page. The GUI elements in the red rectangle in Figure 11 is the customized GUI which only interacts with the "fake" cursor. In AngryBots, the customized GUI can be activated by pressing the "space" key on the client.
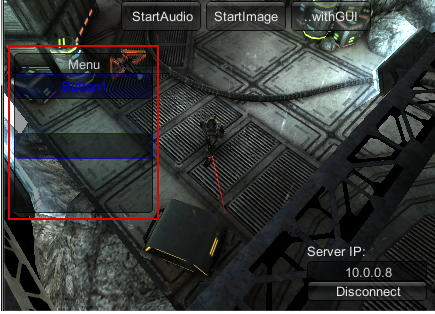
Figure 11. GUI of the server